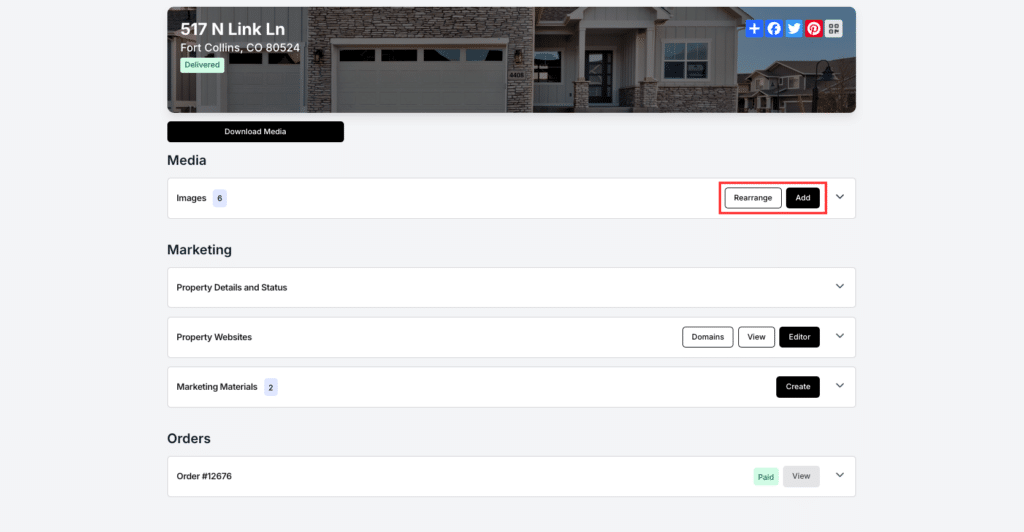
Rearranging, deleting, and adding content can all be done with ease through your Boxwood Photos portal. After logging into your account select listings and go to the desired listing you would like to adjust. You can also get here by clicking Customize and Download on the delivery email.
The first section you will see under the listing site is Media, this is where all the content ordered will be uploaded.
Media
This category will have two options next to it - Add and Rearrange. To add additional photos you would like to be displayed on the property website click add and drag the photos you would like to upload to the prompted box, or select upload a local file from your computer.

To rearrange media, click the rearrange button and it will open a larger window which displays your uploaded photos, from here you can adjust the photos by dragging and dropping them in the order you would like. You can create sections as well for your photos by selecting “Create Group”, after naming it (this is up to you what you would like to name it) a new section will appear in the media area where you can upload content. This creates a new tab on the website where the photos will be displayed. Virtual Staging will automatically be placed in its own group upon delivery.
Removing Boxwood Photos Content
To remove content, select the dropdown arrow next to media, this will display the content in full as well, select the red trashcan next to the image to add it to the trash can. Once you have selected all the ones you would like to delete, scroll down and there should be a red box prompting you to delete the selected content. Make sure after each edit you click save to maintain the adjustments you made. Before deleting any content, confirm they are the correct ones you wish to delete, if content has been deleted from the site and you wish to have it back, please contact the office to have that content restored.
